Achieving the overhead lighting I wanted for my Ugly Duckling Dining Room was by far the most challenging part of this room makeover. This room used to a be “formal” living room and when I confiscated the beautiful bay windowed well-lit dining room to use for my Mom Cave, the dark “formal” space became our little-used dining room. Alas, there is no wiring in the ceiling of this room for an overhead fixture.
I had to get creative in order to achieve this…
One thing I DO like about the wiring in this room, is that the plugs behind my chalk painted secretary and my grandmother’s buffet are wired into a switch on the wall that is immediately to the left of where I’m standing. So from the doorway, if I flip that switch on, anything plugged into those plugs will turn on.
On a trek to Ikea, I scored the perfect solution… or the beginnings of the solution, anyway.
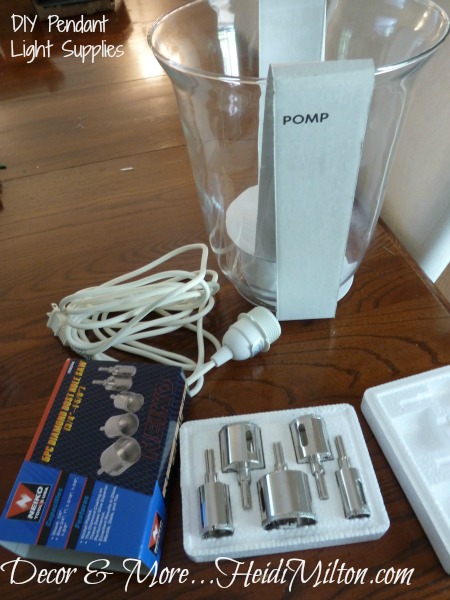
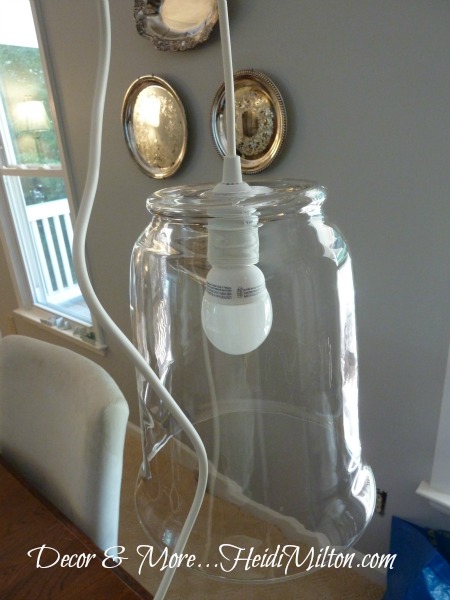
The HEMMA cord set. For about $6. And not only did I find the electrical solution, but I found the perfect glass vase that, when inverted, would give me the pendant fixture I wanted.
The POMP vase for $13! Woo hoo!
All I needed was to drill a hole into the bottom of the vase that would be large enough to feed the plug end of the cord through. After a Google search on drilling holes into glass, several conversations with various home improvement store staff members and a failed attempt using a triangular shaped 5/8 ” diamond dust hole saw, it was clear that I needed the big guns. The big guns being this 5 piece diamond dust hole saw bits that are CIRCULAR. I’ll share the DIY fail next week, but suffice to say, I had to make a second trip to Ikea for another $13 vase and wait for my circular hole saws to arrive from Amazon.
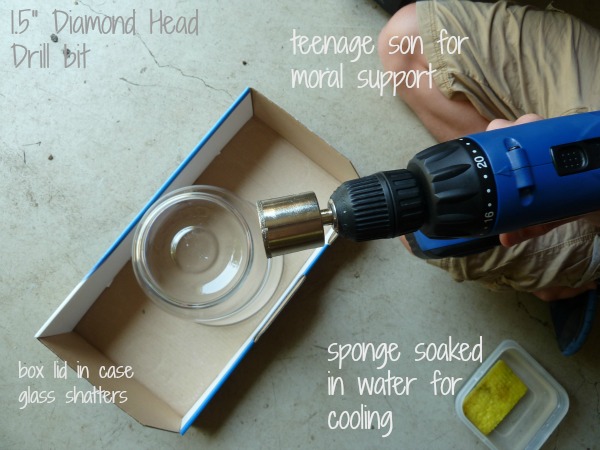
I also enlisted the help of my 14 year old for a couple of reasons. 1) drilling into glass is really a 2 person job. 2) I am a big ole fraidy cat. We set up shop in the garage, with a box lid to contain the vase and a water-soaked sponge.
Of course, we also had safety glasses and gloves.
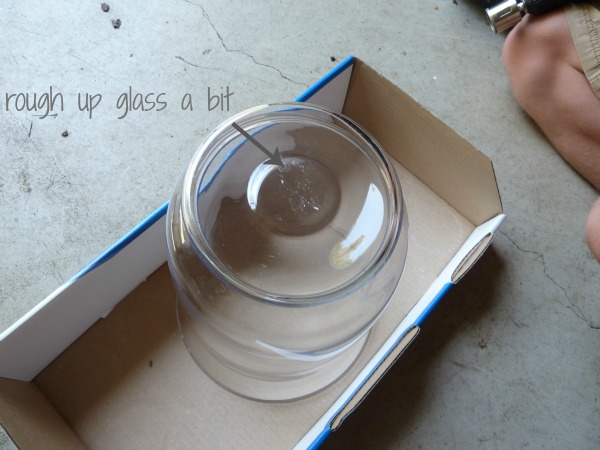
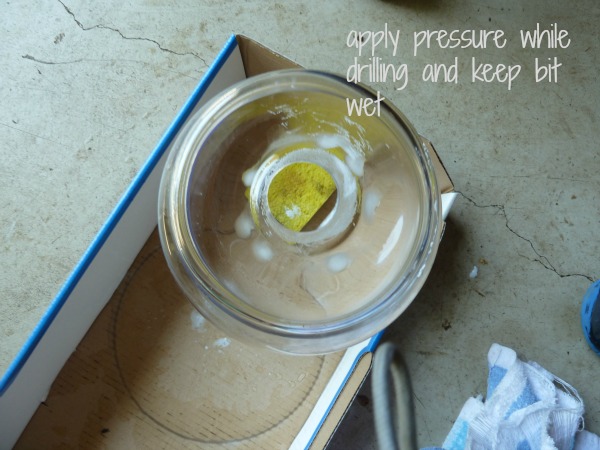
We discovered that we needed to rough up the glass a bit, otherwise the drill bit cannot grip the glass. This is where having 2 people was key: 1 to hold the vase still and the other to operate the drill. After a few stops and starts, the drill bit was able to catch the glass and get cranking. This is where it went pretty quickly. It’s important to apply some pressure, hold the drill level so your circle will be centered AND squeeze water onto the drill bit while drilling. Again, good to have 2 people.
Within about 3 minutes of drilling, we were through — a circle popped out! I was thrilled with how even it was. And relieved that we had success.
The plug fed right though the hole perfectly.
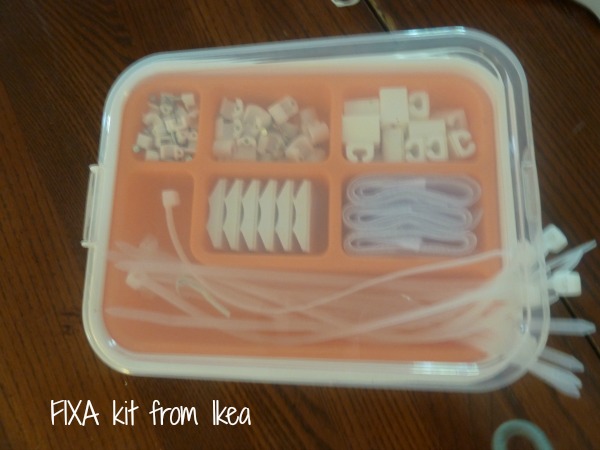
Now, onto the hanging. I used a simple length of silver chain cut at Home Depot, a swag hook (remember those?), and this handy dandy kit, also from Ikea.
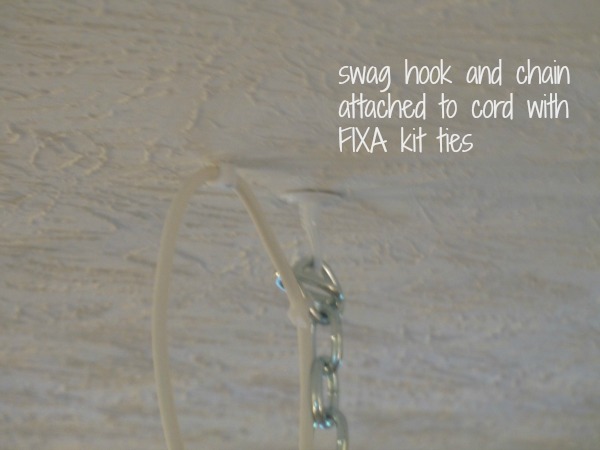
I bolted the swag hook into the ceiling right where I wanted the pendant to hang. Using the cable ties from the FIXA kit, I attached the chain to the cord of the light. Then I hooked the end of the chain onto the swag hook.
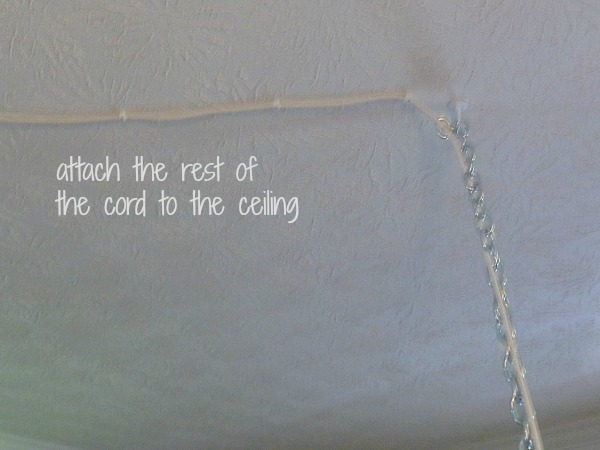
The FIXA kit also had those handy little plastic hooks you can attach to cords and nail into walls, trim, etc. I used those to attach the cord to the ceiling, headed in the direction of the chalk paint secretary and the wired plug behind it.
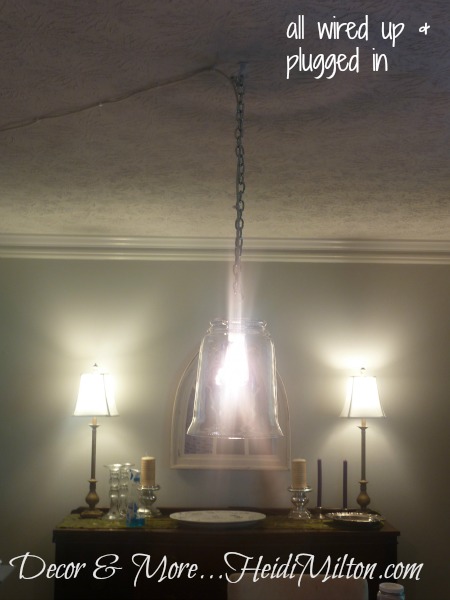
Once I reached the edge of the ceiling with the cord, I dropped it down along the doorway next to the secretary. If you look closely in this photo, you can see it beside the secretary.
And here is a close up of it, all wired up, attached, and plugged in…
Now, I may at some point decide to fully embrace the swag and take the chain all the way. But for now, I’m super pleased with how this looks and functions! The glass is exactly the look I wanted and it provides excellent light that is easily accessed by the flip of a switch!
So what do you think? Be honest, you won’t hurt my feelings. 🙂




oh my goodness how cool! You made that look wayyyyyy to simple! But now I want to go to the hardware store for the drill stuff to do this! I have a couple of rooms that don’t have fixtures and I really really would love to add something just like this! Thanks for the inspiration sweet friend. I LOVE your room!
Jaime
Very cool Heidi!! You are too creative! Your new light fixture looks great!
WOW! it looks beautiful!!!! very very cool!
I LOVE it, Heidi. I have drilled into glass before, 2 people is KEY…you are so right. Such a great DIY option. Pinning. 🙂
Yayyy! I love it so much!!
Well, if at first you don’t succeed, you “nail it” on the second try…I love that chandy…you did a great job and kudos to you for all the research. Your hard work certainly paid off…It looks great over the table!!
Heidi, I love it!!! Such a perfect solution to get the look you want without having to wire new electrical. 🙂
Awesome job…to you and your son….thank you for all the info you acquire on how to do this….I don’t know if I would have venture to this….but you guys did and awesome job….just might try this one day….tfs
You learn something new everyday & I just did! I didn’t have a clue how to drill into glass. So cool that you turned a $13 (or $26 🙂 into a light!!
It turned out fabulous – gotta love Ikea for supplies!
Kelly
Years ago I was taught to drill glass by making a clay dike around the area you wanted to drill and filling it with kerosene as a coolant/lubricant, of course you need a carbide drill.
It looks great! I was planning on doing something similar and I found your tutorial the most useful!! How did you attach the swag hook into the ceiling? Did you have to drill a hole? I am at a rented apartment and I cant drill a hole. Do you have any suggestions or alternative method?
Your light looks so pretty – perfect for your dining room too! Gotta love Ikea, huh? I’ve got your post here linked to mine today too – for a great DIY pendant lights roundup!