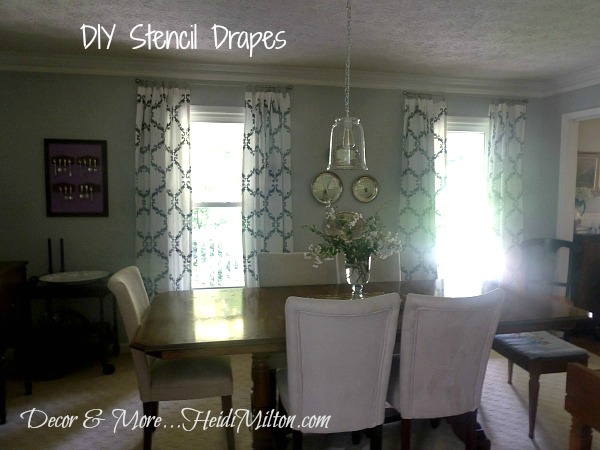
Though it’s hard to pick a favorite project in my Ugly Duckling dining room, I think the project that made the biggest difference in my space is my drapes…
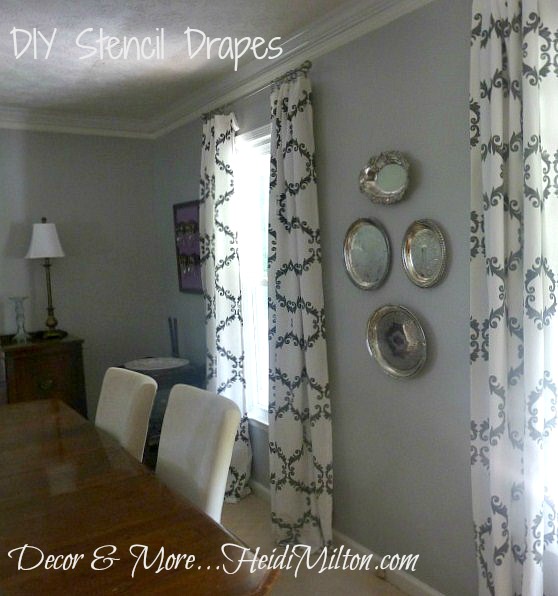
After living with simple blinds for soooo long, I was completely unprepared with how finished these drapes make my space feel!
And this project had a ton of bang for the buck! Here’s how it came about…
It all started when I went to Haven. I was so thrilled to receive a sample of Royal Design Studio stencils in my swag bag! And then I got to visit their vendor booth and check out even more of their wonderful selection of stencils and even some technique demonstrations. I came away with loads of inspiration… and a fab catalog of their stencils. 🙂
Fast forward to my Blogging Without Borders challenge last summer. When I began to plan out the projects for my Ugly Duckling dining room, drapes were at the top of the list. Now you all KNOW I’m a No-Sew Gal (even though it’s a goal of mine to learn), so sewing drapes was out of the question. Ready-made drapes were uninspiring. So when I came across Megan’s stenciled drapes post, my thoughts began to come together for my dining room.
Source: balancinghome.com via Heidi on Pinterest
See what I mean?
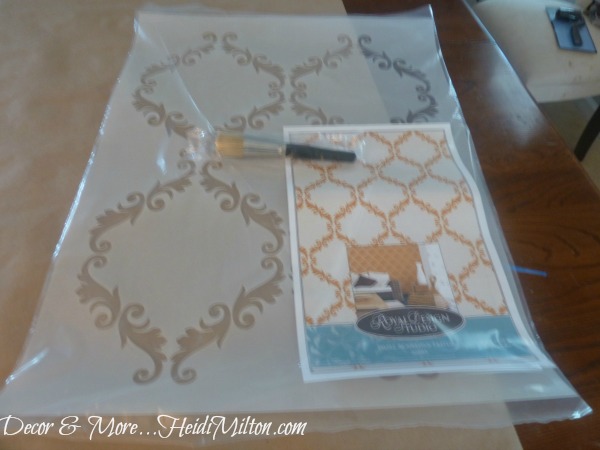
The first place I turned was my Royal Design Stencil catalog. I knew I’d find what I wanted there and I was right… the Small Acanthus Trellis stencil. Just the right combination of geometric and floral patterns. The size of the stencil was a consideration, too. I didn’t want one that was too small because I knew I’d be stenciling four panels of draperies. This stencil was the perfect scale and the overall size of the stencil itself (21.5 x 27.75″) would limit how many times I had to move the stencil to cover the panels.
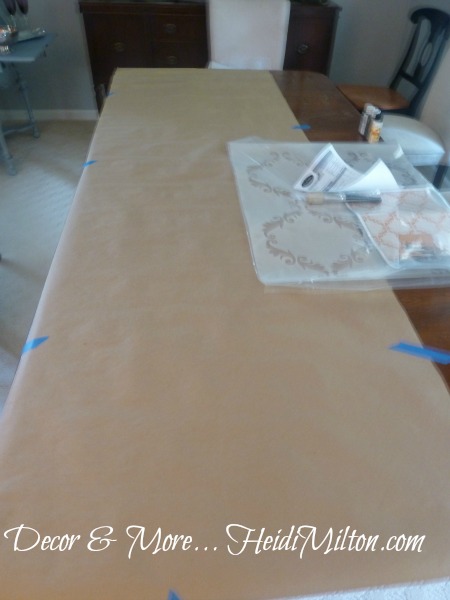
On my first trip to IKEA, I picked up simple LENDA panels in cream — a real deal at $19.99 for a set of two. After washing, ironing, and using the hem tape included with them (No Sew, remember??), I was ready to get stenciling! I set up shop on my dining room table, covered with craft paper and assembled my supplies.
Sorry for the blurry photo, but I was anxious to get this project rocking! Here’s what I used:
- LENDA panels from IKEA (2 sets – 4 panels total)
- Plaid Craft paint in Classic Gray
- Textile Medium
- water (I’ll explain)
- small sponge roller
- blue painters tape to hold stencil securely while still being easily moveable.
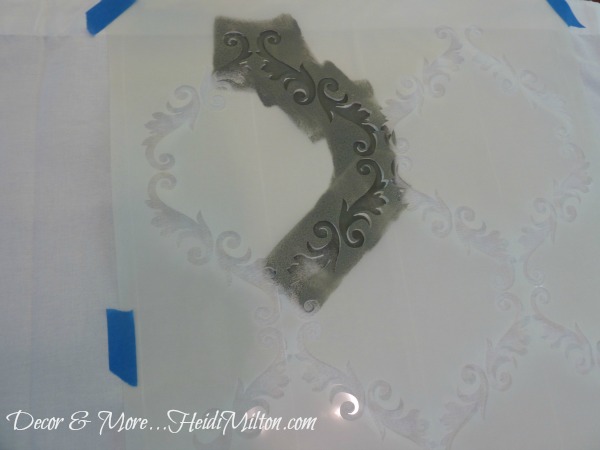
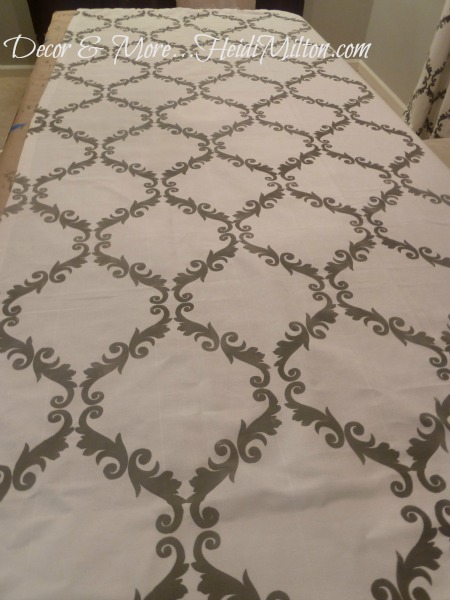
I laid each panel out and began the stencil in the CENTER TOP of the panel, working my way from top to bottom. This is so the pattern of the stencil would be centered on each panel. After one complete pass from top to bottom, I realized my paint was just a tad too think, even when mixed with the textile medium. So I began diluting the paint ever so slightly with a bit of water. The paint went on much more smoothly, requiring less pressure with the roller and a slightly quicker drying time.
After working top to bottom down the center of the panel, I could then finish off the left side and then the right side. Each panel took about an hour to stencil completely, and then I cleaned the stencil while letting the panel dry completely.
Here is one, drying in place. While there are a few imperfections in my stenciling, the scale of the pattern makes it very forgiving and the overall impression is one of uniformity. In other words, the stencil itself makes it look like I knew what I was doing. 🙂
I completed this project in one long afternoon/evening/late night. I couldn’t wait to hang up my new drapes!
I am so impressed with how well the stencil held up! I gave it a work out, that’s for sure! It cleaned up really easily with soap, warm water and a sponge so it’s ready for another project.
You might know that the LENDA drapes are actually tab top drapes. Years ago I saw on Dear Genevieve (yes, she’s a hero of mine) that you could simply cut off the tabs and use rings with clips. I wanted that more sophisticated look, so I scored both my rods and the rings with clips from Hobby Lobby. They have a nickel finish to complement all that silver I’ve got going in the space.
I absolutely adore how these drapes turned out! They have a custom look and feel on a shoestring budget. Here’s the breakdown of what I spent…
- Drapery panels (IKEA) $40
- Plaid Craft paint (WalMart) $11
- Textile Medium (Hobby Lobby) $6
- Rods and clips (Hobby Lobby) $40
- Stencil — provided by Royal Design Studio in exchange for a review
Total cost of the project? $97. Awesome finishing touch for the Ugly Duckling Dining Room? Priceless! I’ve already ordered more stencils for some upcoming projects from Royal Design Studio. Visit their website for amazing project ideas, inspiration, how-to’s, and to see their extensive collection of stencils and stenciling supplies.
I was provided the Small Acanthus Trellis stencil by Royal Design Studio in exchange for an honest review. All opinions expressed in this post are strictly my own.





I never would have guessed! Also, love the color you selected for the stencil – love it! M.
I am in love – do you realize I do not have one single curtain in my house!
Oh, and I can’t sew so this is perfect for me. They add drama to that gorgeous dining room!
Pinning this so I banish some of my poor naked windows.
Kelly
WOW!!! I would have never thought you stenciled them, but I will say when I first saw your finished dining room I immediately thought, “Oh I love how the drapes bring it all together!” 🙂
I just can’t even tell you how much I love these curtains! They look so expensive and just perfect in that room!
Heidi,
I would like to know if you are taking orders!!!!!!!
They look beautiful!!
Vicki Molina
Heidi…they are just gorgeous!!…You did such a fantastic job…Love them!! Thanks for the great detailed tutorial!
They look fantastic. Thanks for including me 🙂
I just love these! I’ve been going back and forth about stenciling curtains for my master bedroom makeover, but I just can’t decide! I’m determined to find some fabric I love, but then again I hate sewing too!
WOW! heidi those are amazing! i love love love them!
They really are fabulous. I’ve been threatening to do some stenciling on our walls, but haven’t worked up the guts just yet.
ohhhh my GOODNESS!!! I LOVE these! I shopped and shopped and well, shopped for something just like these for my new place…. and they all costed about $80 a panel on average…. yours are AMAZING! Good job friend!!! AND a huge thank you for linking up, that means so much to me! I am going to pin your post in our happy hour feature board 🙂
Hope you are having a great night!
Jaime
These came out so awesome, Heidi!!! I love them. 🙂 I’m not really a stencil girl, but this makes me want to give them a try.
This is so great, thanks for the tutorial. I so want to try this now! Now to make a trip to IKEA.